Top

Tips on Prototyping for Usability Testing

Practical Usability

Moving toward a more usable world

A column by Jim Ross
October 8, 2012

Because user research studies peoples’ behavior, the most effective research techniques involve observing participants doing things and talking about what they’re doing. Research that focuses on opinions and discussions of behavior in the abstract isn’t as useful, because it’s difficult for people to talk about their behavior out of context or to evaluate a design without using it. Therefore, the best way to evaluate a new design is to create a prototype and give participants something concrete to interact with and react to.

However, there are some differences between testing a prototype and testing a fully functional Web site or application. In this column, I’ll provide some tips that can make your usability studies more successful and help you to avoid problems when testing prototypes.

Champion Advertisement
Continue Reading…

Design First, Then Prototype

Don’t let prototyping drive your design. The best prototyping tools are not necessarily the best design tools. It certainly saves time if you can design and prototype at the same time, but the last thing you should have to focus on when designing are the limitations of a prototyping tool. If you find that you’re spending more time trying to figure out how to make something work in the prototype than on your design, you should take a step back and focus on the design, then later, try to figure out how to prototype it.

Don’t Use Unrealistic Data

It always amazes me how participants notice the smallest details and get hung up on unrealistic data. Ideally, you should test a prototype that has its actual content in place, but it’s rare that the real content exists at the prototyping stage. So, you often have to use placeholder data instead. That’s fine—as long as the content is realistic and doesn’t distract participants or give them the wrong impression. There are several types of problematic information that you should avoid.

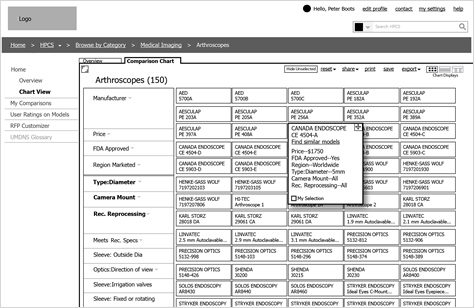
Don’t Use Lorem Ipsum Text

Every time Lorem Ipsum text appears in a prototype, as shown in Figure 1, at least one participant will ask, “Why is this in Spanish?” Besides its being distracting and potentially confusing, Lorem Ipsum text fails to give any context or clue to the type of content that would appear on the actual page. Sometimes it’s necessary to have that context to understand a page’s purpose. Whenever possible, use the actual content or create reasonable placeholder text.

Figure 1—A prototype with Lorem Ipsum text
A prototype with Lorem Ipsum text

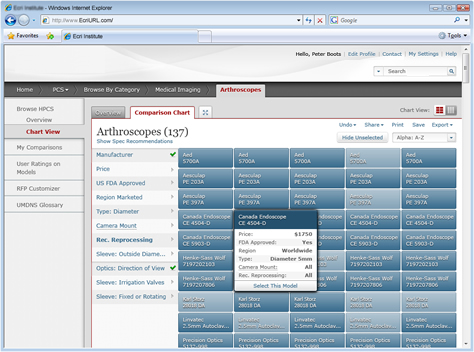
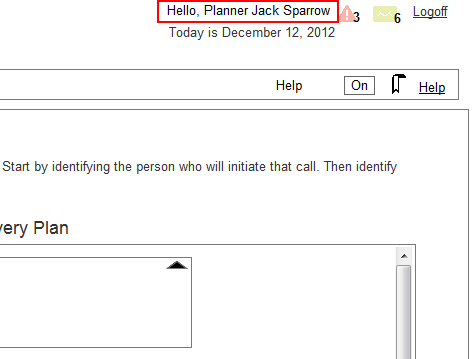
Be Careful with Fake Names

Don’t use the names of well-known celebrities or characters in your prototypes. For example, I once tested a prototype that displayed Jack Sparrow as the name of the logged-in user, as shown in Figure 2. You don’t want participants who are in the middle of a test session to be distracted by thinking about Johnny Depp or how bad the last Pirates of the Caribbean movie was. Instead, use realistic, but generic names. A good source for names is one of the many random name generators on the Web.

Figure 2—A prototype that uses a famous name may be distracting
A prototype that uses a famous name may be distracting

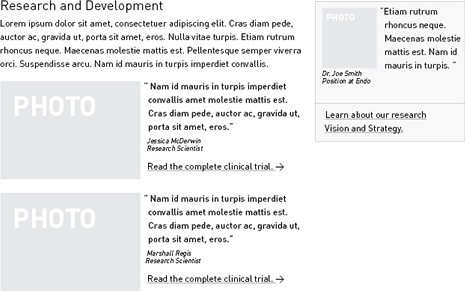
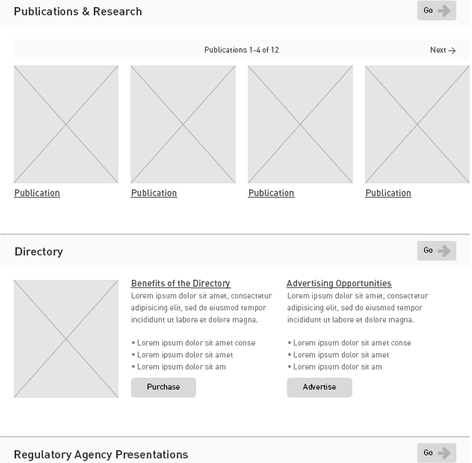
Be Careful with Generic Placeholders

The use of generic placeholders—such as using boxes with Xs in them to represent images, as shown in Figure 3—is not intuitive to participants. Some participants may take placeholders literally, thinking that a box with the word icon in it would appear in the actual user interface. If images are simply decorative, placeholders may be fine. But if the presence of actual images is important to understanding a user interface, use appropriate example images.
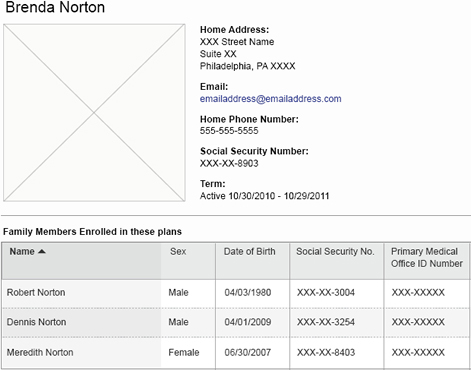
Figure 3—A prototype with generic placeholders
A prototype with generic placeholders

Use Realistic Data

Sometimes participants get fixated on unrealistic data that draws their attention to the wrong things, gives them a wrong impression, or takes them out of the realism of the user interface you’re testing. For example, Figure 4 shows a prototype with Xs replacing certain data. Using Xs to avoid showing complete Social Security numbers makes sense, but participants might wonder whether the actual application would have Xs in other fields or those Xs are just placeholders for actual numbers in the prototype. Either way, this is something that can distract participants from what you want them to be focusing on during testing.

Figure 4—Instead of displaying real data, this prototype substitutes Xs
Instead of displaying real data, this prototype substitutes Xs

Be Careful When Someone Else Controls the Prototype

Whenever possible, create the prototype yourself or work closely with someone who can build it for you. As you plan your study, you commonly have to make changes to the prototype so it fits the tasks you need to test, and it’s often necessary to fix errors or add other functions. If someone else—such as your client—is creating the prototype, it’s more difficult to make these changes quickly and correctly.

Make Sure the Prototype Is Correct and Matches the Design

It sounds obvious, but if someone other than the designer is creating the prototype, you must ensure that the prototype matches the design. I once had a client create a prototype based on our design, which turned out to be a big mistake, because the prototype didn’t exactly follow our design, and we had no ability to change it to fit our design prior to testing.

Beware of Making Design Changes When Fixing Bugs in a Prototype

Despite everyone’s best efforts, it’s common to find some bugs in a prototype as you’re testing. Naturally, your clients would want to fix those bugs between test sessions. If they have the ability to make those changes themselves, they may be tempted to make other changes to address the problems they’ve observed during testing. That can be dangerous if they’ve come to conclusions without enough evidence. In the worst case, clients might make such changes without your knowledge, while you’re busy facilitating a session with a participant. Beware of this problem, and explain to clients why it’s not a good idea to make changes to a prototype during testing.?

Coordinate the Prototype with Your Discussion Guide

There’s often a tricky chicken-or-egg dilemma between creating a prototype or a discussion guide first. Should you create your discussion guide to match what’s already in a prototype, or should you create a prototype based on the tasks in your discussion guide? There’s usually flexibility to do a bit of both. It’s best to follow this process to ensure the prototype and the discussion guide match:

  1. Plan the tasks you need to test.
  2. Create the prototype for those tasks.
  3. Create the discussion guide.
  4. Run through the tasks in the guide using the prototype to ensure that everything works correctly.
  5. Make any necessary revisions to the prototype and the discussion guide.

Conduct Multiple Rounds of Testing Using Prototypes with Different Levels of Fidelity

Some people advocate testing early with low-fidelity prototypes, while others believe in waiting to test a more realistic, high-fidelity prototype. But, ideally, you should conduct multiple rounds of usability testing, using prototypes with increasing levels of fidelity.

Test Before You Have a Prototype

You don’t have to wait until you have a prototype to test. There is a lot of value in testing high-level concepts before you get to page design. For example, you might test concepts such as information organization and labeling using card sorting and tree testing. By testing these important aspects of a design before you have a prototype, you can assess organization and labeling independently, without your page design having any impact on them. Later, once you have a prototype, you can focus on testing the layout and interactions.

Test Early with Low-Fidelity Prototypes

Test early concepts of organization, labeling, and navigation using low-fidelity prototypes, as shown in Figure 5. You can quickly and easily create paper prototypes, then iterate your design through multiple rounds of testing. The informal look of a low-fidelity prototype makes it obvious that the design is a work in progress, and participants feel more comfortable being critical than with a more polished design.

Figure 5—A low-fidelity, paper prototype
A low-fidelity, paper prototype

The most difficult part of testing a paper prototype falls on the person on your team who is playing the role of the computer. Someone has to act as the computer, simulating its reactions to a participant’s actions. This involves shuffling through papers to present the correct screens, menus, or other elements at the right times. The more elaborate the prototype, the more difficult it becomes to keep track of all the pages, menus, and other elements, so you can place them in front of the participant quickly. Doing this effectively requires a lot of practice, so be sure to have several rehearsals before attempting it with a real participant. It’s nearly impossible for one person to facilitate a test, play the role of the computer, and take notes at the same time, so you’ll need a team of at least two people for this type of testing.

When You Can Test Only Once, Use a Medium-Fidelity Prototype

If you have time for only one round of usability testing, using a medium-fidelity prototype similar to that shown in Figure 6 is the best compromise between testing both low- and high-fidelity prototypes. Creating a medium-fidelity prototype takes more work, but it’s still early enough in the design process for you to have time to make changes based on your test results. You can create a simple, medium-fidelity HTML prototype by turning wireframes or mockups into JPEGs, embedding them in HTML pages, and using hotspot links to link pages together.

Figure 6—A medium-fidelity, clickable prototype on a computer screen
A medium-fidelity, clickable prototype on a computer screen

Medium-fidelity prototypes are rough enough to invite honest criticism, but they have more detail than a low-fidelity prototype, allowing you to more realistically test task flows, interactions, and the presentation of information. It’s also much easier for you, as a facilitator, when the prototype functions on its own rather than your having to play the part of the computer and shuffle the pages of a paper prototype, as you must do with low-fidelity prototypes.

Test More Complex Interactions Using High-Fidelity Prototypes

For some designs, it’s helpful to test high-fidelity prototypes like that shown in Figure 7, later in the design process. You can’t evaluate certain complex or novel interactions until participants can actually try them out and see how they work. High-fidelity prototypes let you test more realistic interactions, test your solutions for problems that you found during earlier rounds of testing, and find any remaining usability problems.

Figure 7—A high-fidelity prototype
A high-fidelity prototype

Consider the Limitations of Your Prototype

Whichever type of prototype you’re using during testing, carefully consider its limitations and how they’ll affect what you can and cannot test. When you analyze the results of your study, consider whether issues with the prototype may have influenced any of the problems you’ve identified. For example, low-fidelity prototypes in the form of black-and-white wireframes lack color and other visual cues that affect what people notice. Participants may have problems finding things in a monochromatic wireframe that wouldn’t be at all difficult to find in the final design. Missing content or interactivity can cause similar problems. Consider the impact of such issues when determining what you’ll test and how you’ll analyze the results.

Explaining Prototypes to Participants

It’s easy for those of us in user experience to forget that most people have never seen a prototype before and won’t necessarily understand the conventions. It’s obvious that low-fidelity prototypes need some explanation. However, even high-fidelity prototypes require explanation because, although they look like completely functional interfaces, not all of the functionality works.

Show an Example Prototype

A good way to introduce the concept of a prototype is to show participants an example of a prototype that is similar to the prototype you’ll be testing, but not the actual prototype you’re testing. You can use the example prototype to show them the level of fidelity to expect, what placeholders are, that only certain functions work and others don’t, and which aspects of a design to focus on and which to ignore. An example is much easier to understand than a general description, and it gets all of a participant’s questions and potential misunderstandings out of the way, instead of having them arise during testing.

Explain What Would Normally Happen

In even the highest-fidelity prototypes, not every function works. When a prototype lacks certain functionality or isn’t working as expected, you can use these situations to learn about what a participant anticipates would happen if it were working—for example, where a particular link would lead. At other times, it’s important to explain what would normally happen, depending on a participant’s actions. Without that explanation, participants may make incorrect assumptions that would lead to further errors.

Beware of Dead Ends

When you plan your test tasks and build a prototype, you’ll create certain paths for participants to follow. However, inevitably, some participants will wander off those paths into dead ends—functionality that you haven’t yet built into the prototype. At that point, the only thing you can do is to direct them back to where they left the path, so they can resume the task from that point.

Use the Prototype to Help Clients Understand the Design

In addition to your using prototypes during usability testing, prototypes are also a great way to demonstrate a design to clients. It’s often difficult for clients to understand how a design will work simply by looking at static designs. I’ve experienced many projects where clients kind of understood the wireframes, but didn’t really get them until they saw a functional prototype. Clickable prototypes simulate interactions and ensure that everyone has the same understanding of how a design works. They make the difference between explaining how something works and showing how it works.

Other Tips?

These are just some of the tips I’ve learned over the years from building and testing many different types of prototypes. I’m sure there are many other useful prototyping and testing tips. Please feel free to add them to the comments. Happy testing! 

Principal UX Researcher at AnswerLab

Philadelphia, Pennsylvania, USA

Jim RossJim has spent most of the 21st Century researching and designing intuitive and satisfying user experiences. As a UX consultant, he has worked on Web sites, mobile apps, intranets, Web applications, software, and business applications for financial, pharmaceutical, medical, entertainment, retail, technology, and government clients. He has a Masters of Science degree in Human-Computer Interaction from DePaul University.  Read More

Other Columns by Jim Ross

Other Articles on Usability Testing

New on UXmatters